In such a case
To save scanned image
The scanner can save the scanned images to the scanner's RAM or to the FTP server via FTP communication.
To save in RAM
Save the image scanned by the scanner to the scanner's RAM.
- Click "2. Output" in the sidebar on the left side.
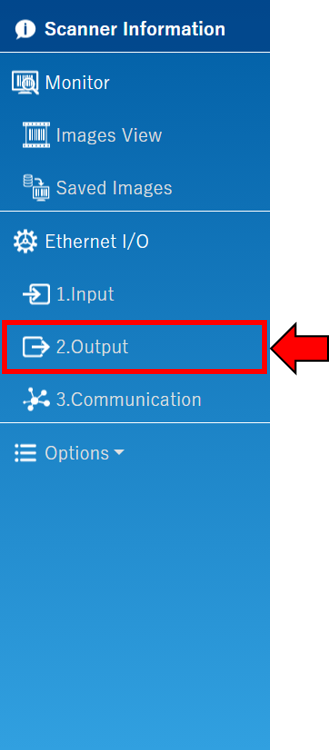
- Click "Images Save" on the top tab.

- Select the situation to save in RAM in "Image Save Location" and select "RAM" from the options.
- Click "Save" to complete the setting of RAM save.

Images saved in RAM can be viewed in "Saved Images."
Click here for "Saved Images."To save scan image by FTP
Send the images scanned by the scanner to the FTP server.
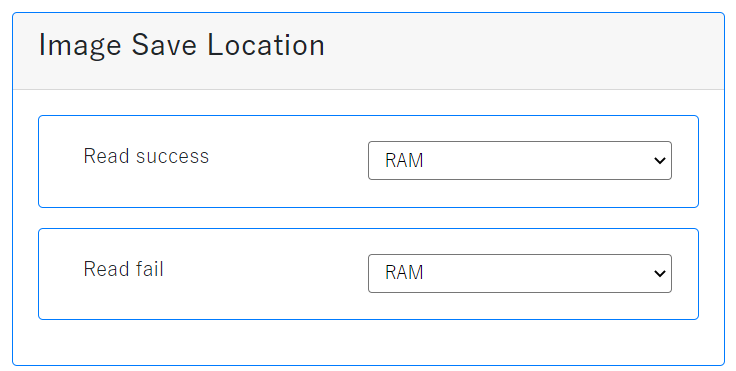
- Click "2. Output" in the sidebar on the left side.
- Click "Images Save" on the top tab.
- Select the situation to save in FTP in "Image Save Location" and select "FTP" from the options.
- Click "Save."
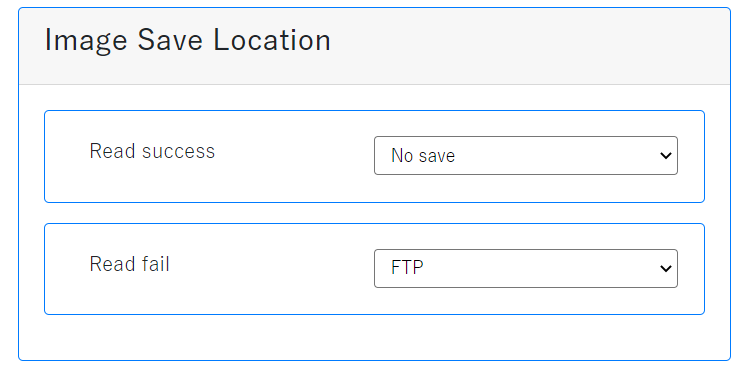
- Click "3. Communication" in the sidebar on the left side.
- Click "FTP Connect" on the top tab.

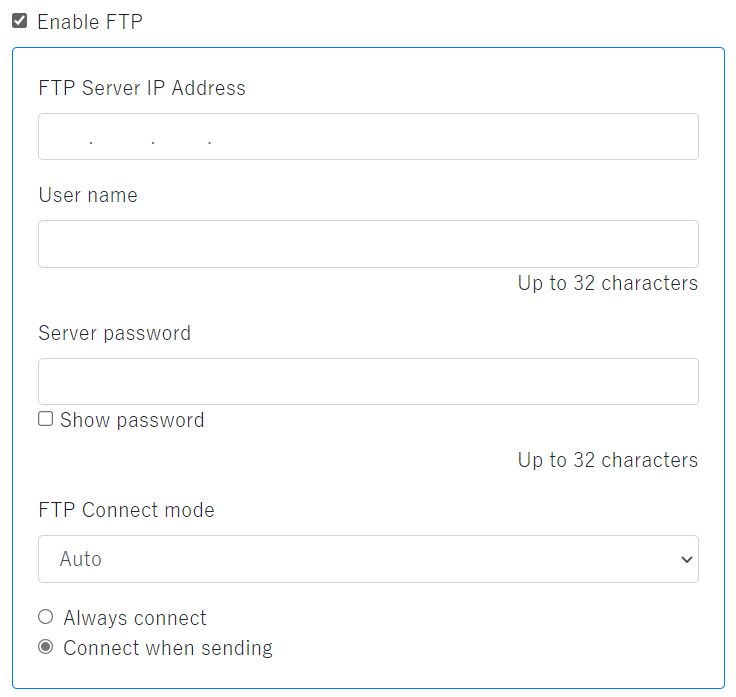
- Check "Enable FTP" and set the server address, user name, and password according to the FTP server to use.
- Click "Save" to complete the setting of image save by FTP.
Control Input terminal
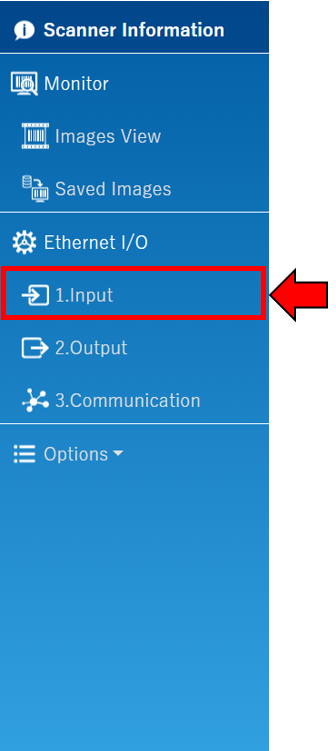
- Click "1. Input" in the sidebar on the left side.
- Create settings in "Input Terminal Configuration".Click here for details.
- Click "Save" to complete the setting of Input terminal.
Control Output terminal
- Click "2. Output" in the sidebar on the left side.
- Create settings in "Output Terminal Configuration".Click here for details.
- Click "Save" to complete the setting of Output terminal.
Connect PLC with Ethernet
- Click "3. Communication" in the sidebar on the left side.
- Click "Industrial protocol" on the top tab.

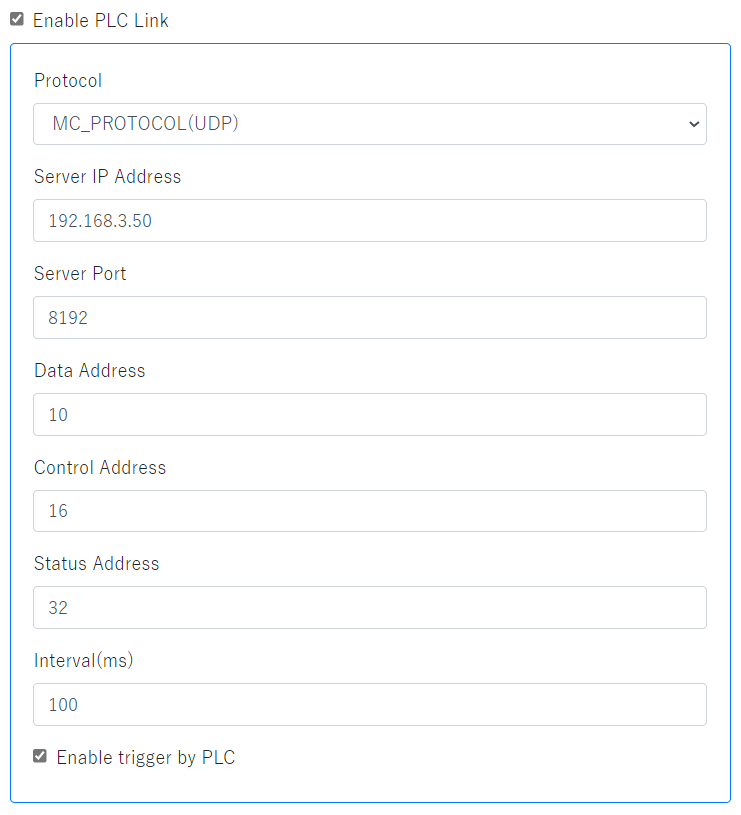
- Check "Enable PLC Link" and set the server address, server port, data address, control address, status address, and interval.Click here for details.
- Click "Save" to complete the setting of PLC and Ethernet connecting.