2. Output
2. Output (data output Configuration)
Configure settings related to output of the scanner.
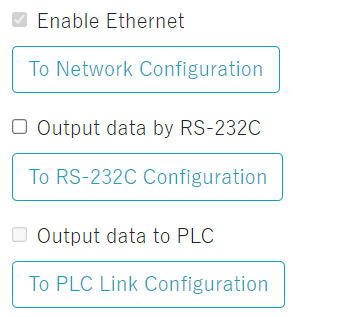
| Enable Ethernet | The scanner can always output data via Ethernet. |
|---|---|
| Output data by RS-232C |
To output data via RS-232C, check the check box. |
| Output data to PLC | When the server address is set to the tab "Industrial Protocol" of "3. Communication", a checkmark will be added. |
| To Network Configuration To RS-232C Configuration To PLC Link Configuration |
Click to jump to 3. Communication settings. *A warning will be displayed when jumping if there are changes in the settings. |
FTP Data Send
| Transfer the read data | Check here to transfer the read data by FTP. |
|---|---|
| File name | Enter the file name to input the read data. Characters that can be used: Up to 16 single-byte alphanumeric characters. |
| Add data to the data file |
Check here to add the read data sent by FTP to the specific file. |
Refer to below for the data sent by FTP data transmission.
| Format | CSV format |
|---|---|
| Record format | "Date", "Image file name", and "Scanned data" [CR][LF] If [CR] is set to suffix, [CR] will be output as is to the scanned data. |
When transferring FTP data, the FTP communication setting in 3. Communication tab and directory change also need to be set.
Output Terminal Configuration
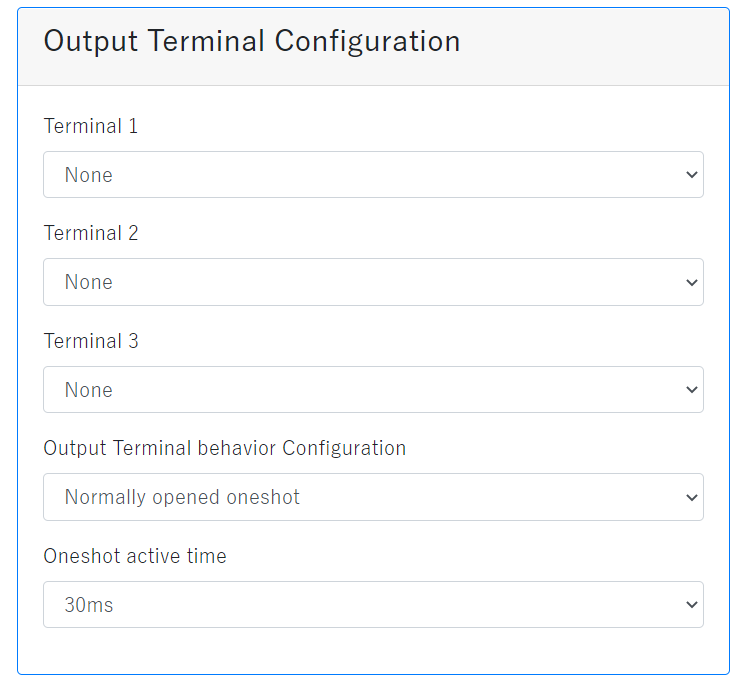
| Terminal 1, Terminal 2, Terminal 3 | Select the preferred operation from "None", "OK" , "Error" or "Warnings". |
|---|---|
| Output Terminal behavior configuration | Select preferred operation from "Normally opened (SYNC)", "Normally closed(SYNC)", "Normally opened Oneshot", and "Normally closed Oneshot." "Normally opened (SYNC)" means Signal is closed (ON) until cleared. "Normally closed(SYNC)" means Signal is opened (OFF) until cleared. "Normally opened Oneshot" means Signal is closed (ON) for a period of time. "Normally closed Oneshot." means Signal is opened (OFF) for a period of time. The output circuit is a photo relay. In the normally opened setting, the photo relay is nomally OFF, the output terminal is opened, and when active, the photo relay is turned on and the output terminal is closed. In the normally closed setting, the photo relay is nomally on, the output terminal is closed, and when active, the photo relay is turned off and the output terminal is opened. The signal output image of SYNC and One Shot is shown below. Note that the signal is HIGH active(Photo relay on, output terminal closed) and the time to stay active in One Shot is T. 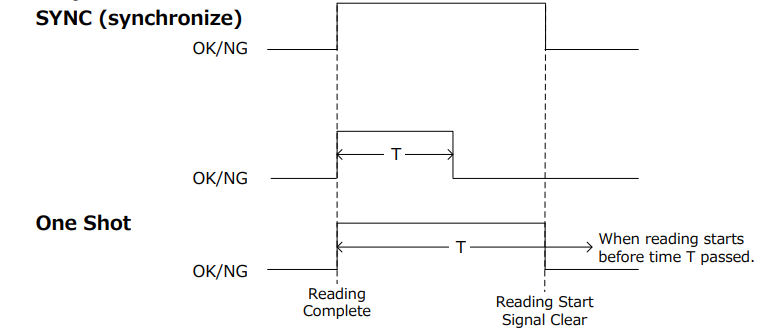 Sync activates the OK, NG or Warnings signal after the read is complete and remains active until the next read starts. In Oneshot, it becomes active when the reading is completed and becomes inactive after time T. If the next reading is started before the time T is passed, it will be inactive in the middle. Time T can be set in "Oneshot active time." |
| Oneshot active time | This can be set only when either "High active Oneshot" or "Low active Oneshot" are selected. |
2. Output (images Save)
Image Save Location
Image save location can be selected from either not save,
RAM, and FTP transmission when reading success or reading fail.
Images saved in RAM can be viewed from "Saved images".
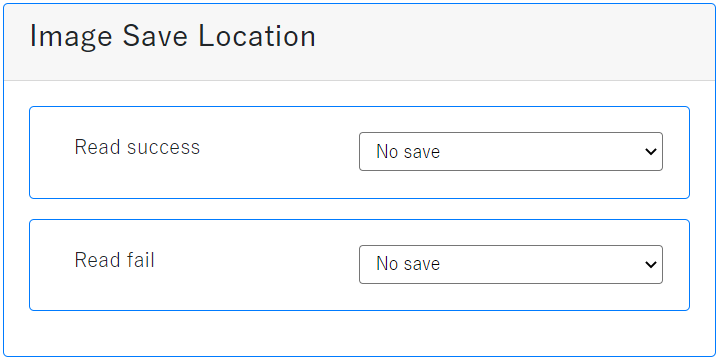
To save in FTP, "Change directory" in this tab and FTP communication settings in the tab "FTP" on "3. Communication".
Images Save Configuration (common)
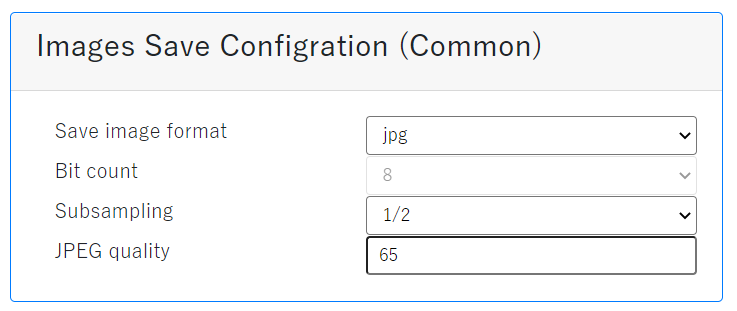
| Save image Format | Select from bmp (bitmap) or jpg (JPEG). |
|---|---|
| Bit count | The number of bits when saving as bmp can be specified. |
| Subsampling | The size of the image to be saved. 1/2 is 320 x 240 size. |
| JPEG quality | The quality when saving as JPEG can be set. Select from 5 to 100. The closer to 100, it can be saved in high quality. |
Improving the image quality will increase the processing time and may increase the reading interval.
For high-speed reading, lower the image quality and evaluate it thoroughly before use.
Image File Name
The image file name can be set.
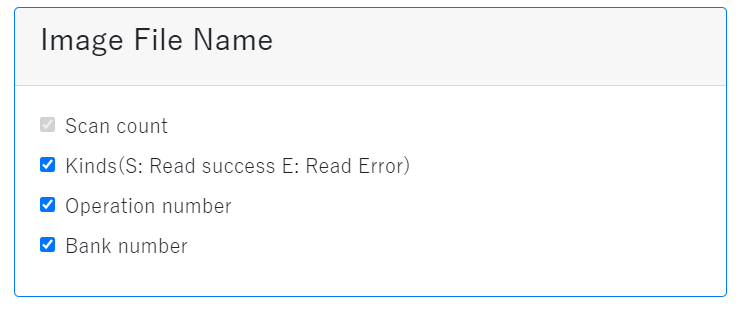
| Scan count | The number of scans from the boot of the scanner. The number from 000 to 999. |
|---|---|
| Type | S represents scan success, E represents scan failed. |
| Operation number | Operation number: Currently, 00 is displayed. |
| Bank number | The bank when the image was taken. |